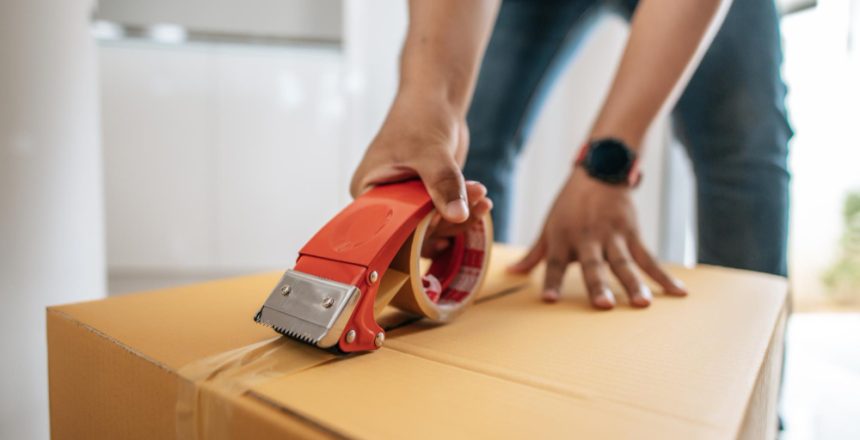
When it comes to moving, every inch of space counts. Dive into the world of efficient packing as we unveil expert tricks that not only help you fit more into your moving pod but also ensure everything arrives in perfect condition. Let’s transform the way you pack, one expert tip at a time.
Key Takeaways
- Pre-packing preparations, such as decluttering and taking inventory, pave the way for an organized move.
- Effective loading techniques involve starting with heavy items at the base, distributing weight evenly, and filling gaps with lighter items.
- Fragile items need special care using cushioning materials like bubble wrap, clear “FRAGILE” labeling, and proper placement within the pod.
- Prioritizing immediate-use items in accessible locations simplifies the initial settling process at the new place.
What is a Moving Pod?
A pod, often referred to in the context of moving and storage, is a portable on-demand storage unit. Unlike traditional moving trucks or permanent storage units, pods offer the convenience of being delivered right to your doorstep. They can be used for a variety of purposes, from temporary storage during home renovations to a full-scale move across the country.
The beauty of a pod is its flexibility. Once it’s filled, you can choose to store it on your property, have it moved to a new location, or store it in a secure pod storage facility.
How Much Do Moving Pods Cost?
The cost of renting a pod can vary based on several factors. These include the size of the pod, the duration of the rental, the distance it will be transported (if at all), and any additional services or features you might opt for. On average, you might expect:
- Local Moves: Prices can range from $200 to $800, depending on the size of the pod and the duration of the rental.
- Long-Distance Moves: For moves over 100 miles, costs can range anywhere from $1,000 to $3,000 or more, again dependent on pod size and duration of the rental.
- Storage Costs: If you choose to store your pod at a facility, expect to pay an additional monthly fee, which can range from $100 to $300 depending on the region and the size of the pod.
Pre-Packing Tips
Before diving into the actual packing process, some groundwork can make the endeavor smoother and more efficient. Pre-packing is all about preparation, and a well-prepared move can save you both time and stress. Here are two pivotal steps to consider:
Decluttering: Separating Essential Items from Non-Essential
Before you start packing, it’s beneficial to sift through your belongings and separate what you truly need from what you can live without.
- Review Your Belongings: Start with one room at a time. As you go through each item, ask yourself if you’ve used it in the past year. If not, it might be time to part ways.
- Categorize Items: Create three categories: Keep, Donate, and Dispose. Items in good condition that you no longer need can be donated, while broken or unusable items can be discarded.
- Re-Evaluate: Once you’ve categorized everything, take another look at your ‘Keep’ pile. Ensure that everything there is truly essential, and be ruthless in your evaluations.
By decluttering, you’ll reduce the volume of items to be packed, potentially saving on packing materials and space in your pod.
Taking Inventory: Creating a List of Items to be Packed
Once you’ve streamlined your belongings, the next step is to take inventory. Knowing exactly what you have can make the packing process more organized and help ensure nothing gets lost in the shuffle.
- Document Everything: As you prepare to pack each item, jot it down. This can be as simple as a handwritten list or as detailed as a digital spreadsheet.
- Use Descriptions: For valuable or unique items, provide detailed descriptions. This can help with both organization and any potential insurance claims.
- Label Boxes: As you pack, number your boxes and correspond those numbers to your inventory list. This way, you can quickly find items when unpacking.
- Photograph Valuables: For high-value or sentimentally important items, consider taking photos. These can serve as a record of their condition before the move.
By taking the time for pre-packing preparations, you set the stage for a more efficient, organized, and stress-free move.
Essential Packing Materials
When embarking on the journey of packing a pod, the foundation of success lies in having the right materials on hand. Your items deserve the best protection, and using quality packing materials ensures that they remain safe during transit. Here’s a breakdown of what you’ll need:
- Sturdy Boxes of Varying Sizes: Use large boxes for light, bulky items like linens, and small boxes for heavy items like books and kitchenware. Ensure boxes are robust to avoid damage.
- Packing Tape and Bubble Wrap: Quality tape keeps items secure. Use bubble wrap for fragile items to cushion against shocks.
- Labels and Markers: Label boxes for easy identification during packing and unpacking, noting contents and handling instructions.
Step-by-Step Loading Techniques for Loading a Moving Pod
The key in loading a pod lies in understanding how to best utilize the space you have, while ensuring the safety and security of your belongings during transit. Here’s a detailed breakdown of how to approach the loading process:
Starting with Heavy Items: Placing them at the Base
The foundation of a well-loaded pod is in its base layer. Beginning with your heaviest items can set the tone for stability throughout the entire pod.
- Identify Your Heaviest Items: This typically includes furniture pieces such as sofas, dressers, and dining tables.
- Position Strategically: Place these items in the pod first, ensuring they are flush against the walls. This not only provides stability but also takes advantage of the pod’s sturdiest sections.
- Protect Surfaces: Use moving blankets or pads to cover furniture surfaces, protecting them from scratches and dings.
By beginning with the heaviest items, you create a solid foundation upon which to build the rest of your load.
Distributing Weight Evenly: Ensuring Stability
An unevenly loaded pod can be a hazard, especially during transport. Distributing weight evenly across the pod ensures it remains stable on the road.
- Balance Out Heavy Items: If you place a heavy item on one side of the pod, try to balance it out with a similarly heavy item on the opposite side.
- Mind the Middle: The center of the pod can bear a lot of weight. Consider placing medium-weight items here to help distribute the load.
- Check as You Go: Periodically step back and assess the weight distribution. Adjust as necessary to maintain balance.
Side note: If you’re considering shipping your car during a move, Mercury Auto Transport can guide you in selecting the most suitable method, be it self-driving, container shipping, or utilizing a professional auto transport service.Contact us for a free quote today!
Filling Gaps with Lighter Items: Maximizing Space Usage
Empty spaces and gaps in your pod are missed opportunities for efficient packing. Filling these gaps not only maximizes space but also helps to secure items in place.
- Identify Gaps: As you load, be on the lookout for spaces between items, especially after placing larger pieces.
- Use Soft Items: Pillows, linens, stuffed toys, and clothing are perfect for filling gaps. They can be easily molded to fit various spaces and also provide cushioning.
- Consider Odd-Shaped Items: Items like lamps or small appliances can be nestled into gaps, especially if they’re wrapped in protective materials.
Secure in Place: Once gaps are filled, ensure that items won’t shift during transport. This can be achieved with bungee cords or moving straps.
Safeguarding Fragile Items in a Moving Pod
Here’s how you can give your fragile items the protection they deserve:
Using Bubble Wrap and Newspapers
The first line of defense against potential damage is effective cushioning, and bubble wrap and newspapers are among the top choices.
- Bubble Wrap: Ideal for wrapping individual items, bubble wrap provides a cushioned layer that absorbs shocks and impacts.
- Newspapers: An eco-friendly and cost-effective alternative, newspapers can be crumpled and used to fill voids in boxes or wrapped around less delicate fragile items.
- Layering: For added protection, consider using both bubble wrap (closest to the item) and newspapers (for filling gaps). This combination can offer a robust shield against potential harm.
Labeling Boxes with ‘Fragile’
Proper labeling is crucial. It informs everyone handling the box about its contents and how it should be treated.
- Clear Markings: Use a bold marker to write “FRAGILE” on all sides of the box. This ensures visibility no matter how the box is oriented.
- Additional Instructions: Consider adding labels such as “This Side Up” or “Handle with Care” to provide further guidance.
- Prioritize: When loading, boxes labeled ‘Fragile’ should be easily accessible and not buried under heavier items. This makes them easy to identify and handle appropriately during unloading.
Proper Placement to Avoid Crushing
The placement of fragile items within the pod is essential to prevent any crushing or undue pressure.
- Top Layer: Fragile boxes should generally be placed on the top layer of items in the pod. This ensures that heavier items don’t rest on them, potentially causing damage.
- Avoid Stacking: If possible, avoid stacking other boxes on top of fragile ones. If you must stack, ensure that only lightweight boxes are placed on top.
- Secure in Position: To prevent shifting during transport, place fragile boxes snugly between stable items or use moving straps to hold them in place.
Maximizing Vertical Space in a Moving Pod
By maximizing vertical space, you can make certain every cubic foot of the pod is used efficiently. Here’s how you can achieve that:
Stacking Boxes Strategically
Using a systematic approach to stack boxes can help in maximizing vertical space without compromising the safety of your items.
- Start with Sturdy, Uniform Boxes: These serve as a solid foundation for stacking.
- Size Gradation: Place larger boxes at the base and gradually move to smaller boxes as you stack upwards.
- Mind the Gaps: Ensure that boxes align well with each other. Any gaps or overhangs can compromise stability.
- Secure Stacks: Consider using moving straps or bungee cords around groups of boxes to hold them together and prevent them from tipping over during transit.
Using Shelving Units or Vertical Dividers
Implementing structural additions like shelves or dividers can further optimize the vertical space and provide organization.
- Temporary Shelving: Portable and collapsible shelving units can be placed inside the pod.
- Vertical Dividers: Plywood or similar sturdy materials can act as dividers, creating separate sections within the pod.
- Hooks and Hanging Solutions: Use the walls and roof of the pod to your advantage. Install hooks or use adhesive hanging solutions to suspend items, freeing up floor space.
- Securing Structures: Ensure that any added structures, like shelving units, are securely anchored to prevent them from collapsing or shifting during transport.
Easy Access to Essential Items
Streamlining your move means ensuring that vital items are within quick reach upon arrival. Here’s how to efficiently prioritize:
Pack Immediate-Use Items Last
- List Priority Items: Think of what you’ll need on the first day—chargers, toiletries, medications, and a change of clothes.
- Use Transparent Containers: Packing essentials in clear bins lets you spot them easily.
- Distinct Labels: Mark these as “IMMEDIATE NEEDS” or “DAY 1.”
The ‘Open First’ Box
This box should contain a blend of crucial items for a smooth start in your new space.
- Key Documents: Store vital papers like lease agreements and IDs here.
- Basic Tools: Pack essentials like a screwdriver and scissors.
- Kitchen and Personal Items: Include basic cookware, utensils, and toiletries.
- Kids and Pets: Add necessary items for children and pets, like toys or snacks.
By focusing on immediate necessities and an ‘Open First’ box, you’ll simplify your initial hours in the new place.
Final Check and Security
Before sealing up your pod, a thorough final check ensures both efficient space use and the safety of your belongings during transit. Here’s a concise rundown:
Ensuring No Empty Gaps Remain
- Visual Inspection: Quickly scan the pod for noticeable voids between items.
- Fillers: Use soft items like pillows, blankets, or packing peanuts to fill these gaps. This not only utilizes space but also provides cushioning.
Securing Items for Transit to Prevent Shifting
- Straps and Bungee Cords: Use these to bind groups of items together, adding stability.
- Anchor Points: Many pods come with built-in anchor points. Use them with ropes or straps to tie down larger items or furniture.
- Final Walkthrough: After securing, gently push or shake items to ensure they’re firm in their place and won’t move during transit.
Conclusion
Packing a pod for moving requires a meticulous approach, prioritizing both space efficiency and the safety of your belongings. By decluttering and taking inventory beforehand, you can streamline your packing process.
Remember, the key lies in preparation, organization, and thoughtful execution. With these guidelines in mind, you’re well-equipped for a stress-free move using a pod.
At Mercury Auto Transport, we understand the challenges of moving. Our goal is to make this process easier for you. If you’re planning a long-distance move and need to transport your car, Mercury Auto Transport can help with that. We offer free quotes for our car shipping services, making your move even smoother.
Frequently Asked Questions About How to Pack a Moving Pod
What should you not pack in a pod?
Avoid packing hazardous materials, perishables, and valuable items like jewelry or important documents in a moving pod.
Is there a weight limit on pods?
Yes, pods have weight limits, which vary by size and model, so it’s essential to check the specific limit for your chosen pod.
Are my belongings safe in a pod?
Your belongings in a pod are as safe as how well they are packed; however, consider insurance for added protection.
What happens if a pod is too heavy?
If a pod is too heavy, it may be refused for transport or incur additional fees, and there’s an increased risk of damage during transit.
How much can fit in a 16 ft pod?
A 16 ft pod can typically fit the contents of a 1-2 bedroom apartment or a small 2-3 bedroom home. But this can vary based on how efficiently items are packed.
How long does it take to unload a 16-foot pod?
Unloading a 16-foot pod varies based on the volume and weight of items, but on average, it takes a few hours with a couple of helpers.
Let Us Handle Your Auto Transport Needs
Mercury Auto Transport is an auto transport broker that presents offers from FMCSA (Federal Motor Carrier and Safety Administration) licensed and insured carriers. We have access to a wide range of car transporters through National Dispatch Boards, and together with you, we can often strategize and negotiate far better rates.
Get a free quote today or speak with one of our professional auto transport representatives and experience seamless and reliable auto transport services.


